Showing posts with label Let's Build a 3D Card Model. Show all posts

Wednesday, May 9, 2012

Let's Build a 3D Card Model - Step 4 -- Conclusion

If you have been working along with the first 3 Steps you will have four walls and two roof sections.  Now is the time to do any cleanup around the door and window openings.  Check the corners for fuzzy card residue and use your knife blade to remove. 

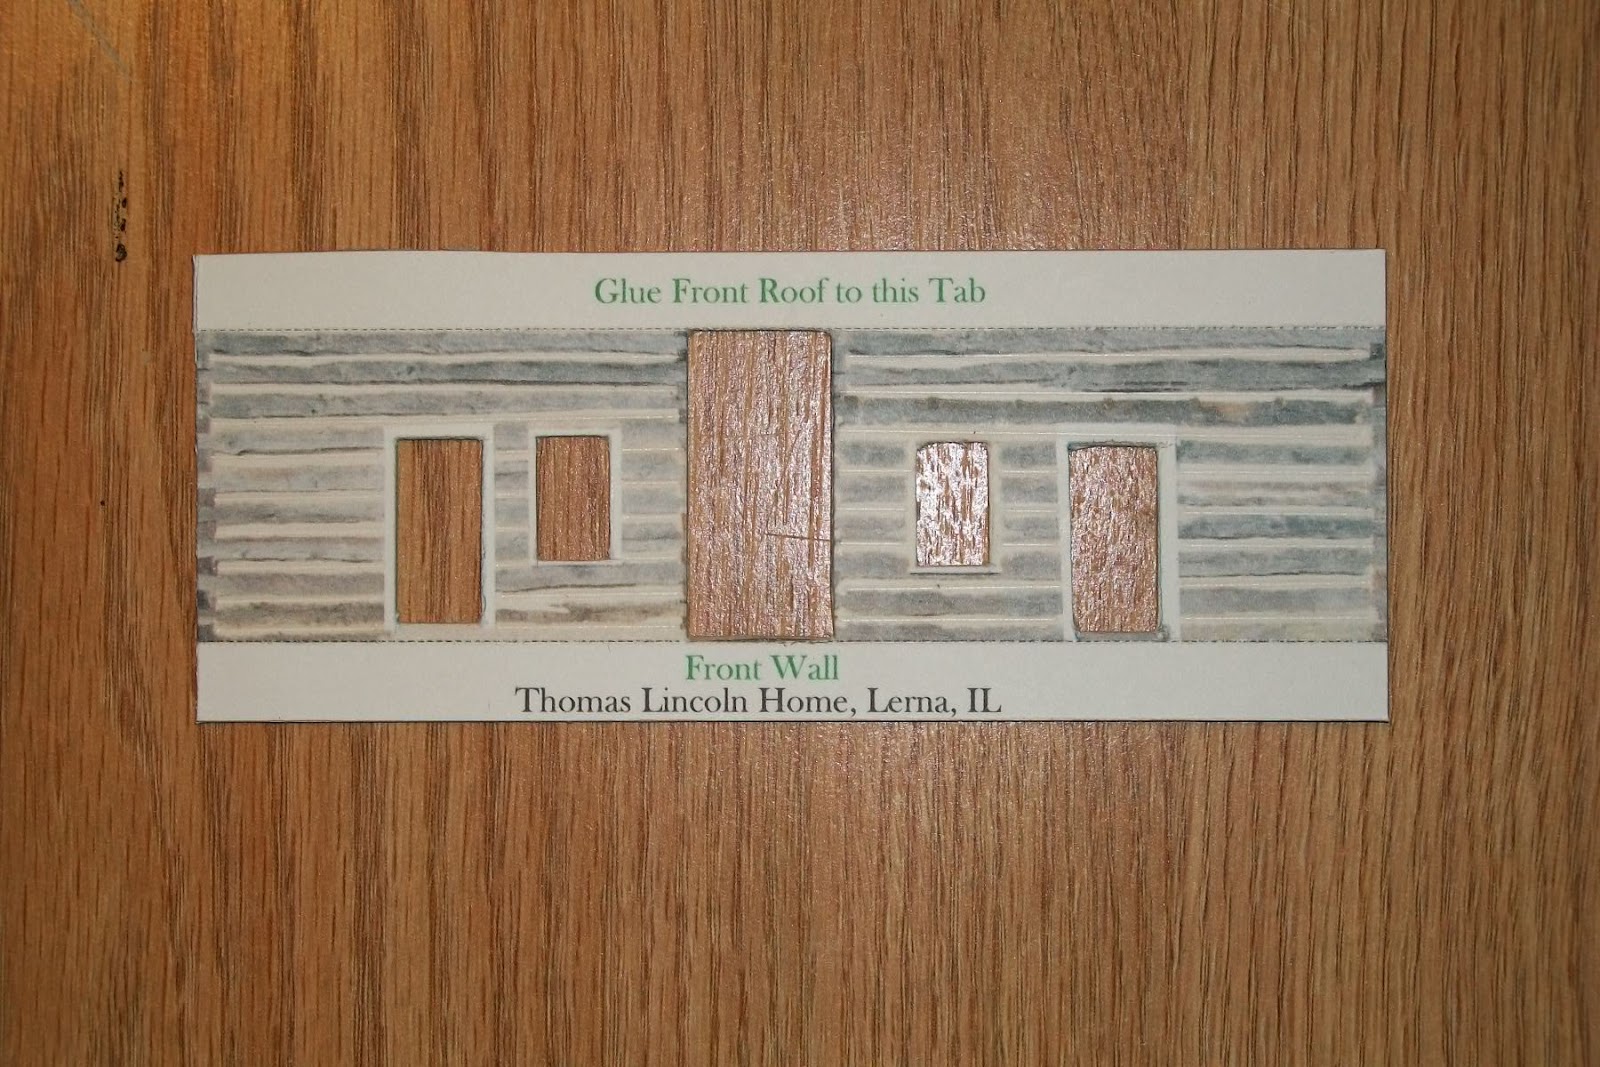
Front wall with cutouts complete and tabs folded'

The two end walls have no cutouts so just fold the tabs.
Take a lead pencil, and from the INSIDE of the door and window openings, use the side of the lead to darken the paper and card backing to eliminate any white spots.  Do it from the inside so if the pencil slips you won't get pencil marks down the face of the building.  Ask me how I know!  Also apply lead to all the edges of the walls and roof sections from the INSIDE faces.


A few problems came up during the assembly:
a.  The chimney is too small to fold easily when glued to the card backing so if you have not glued your sheets to the card cut out the area around it and set it aside.  The best solution is to print the sheet with the chimney and fold as a single sheet of paper.
b.  The tab on the one roof section is too thick to match the other side so I cut the tab off and made a paper hinge to replace the tab. Lay the two roof sections peak to peak (check the position for the chimney) and glue the hinge in position over the seam.
c.  This would be a good time to do something I forgot to do, paint the underside of the roof sections that overhang the walls.  Almost any dark color, tan, brown, black, looks better than the face of the cereal box.
d.  Some of the tabs (mostly at the ground level) need the corners trimmed back about a 1/16" and then at 45 degrees to clear he  tab of the of the mating wall.  I used a small diagonal cutter to trim the tabs, but the knife will do the job just as well.

 To mount the doors and windows recessed into the wall we need to add some spacer strips to the inside of the walls and mounting strips to the back side of the doors and windows. To do this use some of the left over mounted print and cut 4 or 5 strips about 1/8" x 3", holding the steel rule tightly to prevent slipping.

1/8" x 3" strips for mounting the doors and windows.


Study the picture below for a moment.
Using the strips we just cut, trim and glue them to the inside surface surrounding the cutouts, both sides of the 2 big center board wall cutouts, both sides and top of the 4 blue doors cutouts and both sides, top and bottom of the 2 window cutouts.  Align the strips to the edges of the cutouts and use just a couple little dabs of glue.  These strips create the spacing to recess the doors and windows.

Now cut strips about 1/4" longer than the width of the doors and windows and mount to the rear (inside) surfaces with a single little dab of glue.

Spacer strips and mounting strips applied and drying.
When the glue had dried dry-fit the windows and doors in the cutouts and behind the spacer strips.  This is the time to ensure you have the right item in the right cutout.  Also note that some have top or bottom details that must be correct; the big center board walls have weathering at the bottom edge and one window has a person's silhouette.  When satisfied with the fit and location, mount the cutout items with a single dab of glue on the 4 protruding tabs and set aside to dry.
Doors and window located and mounted in the wall sections.

At this time you can take a look at the 3D effect you have created.  If you built the model in Step 1 compare the flat surface with the recessed surfaces.

We are now going to do the final dry-fit of the 4 walls.  check each corner to ensure the tabs don't overlap or interfere with each other.  If you have a small desk drawer you can use the inside corner of it to ensure a square corner and same height where two walls meet.  I cut several right angle triangles with about 3/4" long legs. and glued them as gussets in the corners to keep the structure square.

With the 4 walls complete, fit the roof to the walls and determine how much overhand on each end.  Apply glue along the tabs, locate the roof over the peak of the side walls and hold in position pressing on the end wall tabs to let the glue tack.  Now turn the house over on the roof and press the side wall tabs against the roof, both sides.

The chimney is the last item to mount in the location noted on the roof panels.  Scrape a little glue to the inside of the mounting edges and a very little to the edges and set in place.

Here I am comparing the 3D model with the flat surface model I built earlier.

You now have a substantial model in HO scale, 1:87.  Place it on your HO model railroad, or on the shelf for others to admire.  I am already thinking of a little diorama with a split rail fence, outhouse, well, woodpile, maybe a cow or pig...............

Till next time,

Armchair


Saturday, May 5, 2012

Let's Build a 3D Card Model - Step 3 -- Cutout Details

In Step 1 we downloaded the two free colored  sheets of the Thomas Lincoln house and built the house per the instructions provided.

In Step 2 we mounted the second set of printed sheets to the cereal box card stock.

In step 3 we will begin cutting out the several sections of the building.

Just a reminder, this is a first for me, cutting out details such as doors and windows and mounting them set back from the outside surface of the model, creating a 3D appearance.  Do not expect perfection, we will be learning together.

WARNING:  Tools used in card modeling can cause injuries if not used carefully.  Children should proceed only under adult supervision!

Tools:  In the photo below you will see the tools needed for this part of the project: a knife handle with a #11 blade or other knives with break off or replaceable blades, a steel rule toguide the knife blade, a small hammer and nail or straight pin to locate the corners of the doors and windows.  Not shown is a letter opener I use to scribe the fold lines.

Tools and mounted, printed sheet, ready to make your 3D model.

Note:  You may wish to practice the several action OP's described below using the extra space around the sheet.

OP. #1  Scribe the fold lines with the letter opener using the steel rule to guide and ensure straight fold lines.  Without the cardboard backing this could be done with 3 or 4 firm strokes, but with the card backing I found I also needed to use the knife blade to cut about half way through the backing.

OP. #2  Place the mounted sheet over a scrap of cardboard or foam core to protect the table surface.  Carefully place the point of the nail or pin at the corner of each door or window detail to be removed and use just a light tap of the hammer to pierce about half way through the cardboard backing, just enough for you to locate the point of the knife blade.

OP. #3  Place the print on your cutting board and use a steel rule to locate the cutting line between two corner punches, check each location with the blade point, and while holding the steel rule firmly, lightly stroke the knife blade between the two punches several times. Repeat for each side of the door or window and, with firmer strokes continue cutting until the door is cut free.


Two doors and windows and the center board wall have been removed.

OP.#4  After all the scribing and cutting is complete remove each part by carefully cutting around the part being sure to NOT cut off the fold tabs.  This will leave you with a part shown below.


Cutout front detail part before folding the tabs.


OP.#5  Locate the fold lines at a sharp edge and fold tabs down as shown below.  If the tabs don't bend with firm pressure you may have to use the knife to cut a little deeper into the backing sheet.

Front detail with tabs folded down.

Continue with other details, back, sides and roof, until you have all the parts required for the model.

This is one of the end details with tabs folded.


Details ready for adding the recessed doors and windows for a 3D model

In Step 4 we will be adding the recessed doors and windows and maybe some outside raised details.


Armchair

Friday, April 27, 2012

Let's Build a 3D Card Model - Step 2 -- Add Cereal Box Backing

If you downloaded and built the house in Step 1, you will need to print another set to complete Step 2 .

A.   To add strength and thickness to the model I am going to mount the downloaded sheets to heavier card stock, a cereal box.  I found a box large enough to mount the letter size, 8.5"x11", sheets.

When you card model you save boxes like this.  If you have kids you already have a ready supply.


B.   Cut open the box along the sides to obtain something like this.

Two long cuts and two short cuts provide the basic material.  Save the small, leftover parts for details to come.


C.  Cut out the front and back panels, trimming the edges to ensure a flat surface.

Here are the panels needed to mount the printed sheets.  This slick, outside surface is sealed enough for Yuma, but you may want to seal both sides with spray primer.

 
D.  Here in Yuma, Arizona we have mostly low humidity so I use the cereal box as is, leaving the printed outside surface on the inside of the model and gluing the printed sheet to the bare inside surface.  If you want to protect your model from warping with damp / dry conditions you may wish to seal both surfaces with a spray primer.
These card panels are now ready for the spray adhesive.


 E.  Use a spray adhesive to give the bare surface of the card a light even coat, locate the sheet and smooth out using a stiff ruler.  I just happen to use a tile trowel that I have around.  Leave over night under weights to ensure the panels dry flat.

WARNING: Spray paints and adhesives should be used outdoors, away from flames and with a backdrop to collect the over-spray and protect other surfaces.

All for tonight.  My panels are drying under weight and I will edit this step 2 over the weekend.  Then we start with scribing the fold lines, cutting out the details and folding the corners.

Armchair

Wednesday, April 25, 2012

Let's Build a 3D Card Model - Step 1 -- Free Internet Download

Card modeling is an old craft with a new life.  Old timers like me will, if able, remember cereal boxes with the back printed with some toy or building.  We would cutout the item, fold on the lines noted, push the tabs into the related slots, resulting with a free toy.  With WWII over "real" toys came back on the market and card modeling in the USA fell from favor.  Europe must have spent a few more years with material shortages and card modeling held on with a newer generation.
Now, with the internet, card modeling has surged back with both free and commercial sites offering thousands of models of every imaginable type.  For this little build clinic I have chosen a free American model of a log cabin once belonging to Thomas Lincoln, President Lincoln's father.  This is one of the Build Your Own Lincoln Sites, available at 
 www.lookingforlincoln.com

The completed model is shown with the two pages downloaded from the internet and printed on 110# card stock with a color printer.  The models in this series are 1:87,  HO scale.
I have wanted to try adding depth to a printed model by recessing the doors and windows and applying the shingles row by row, creating a 3D model.  This may require printing a second and possibly a third copy to have enough extra parts to complete the modification.

But for now, go to the site noted above, and even if you have never built a card model, download, print and build the model using the instructions included.  Don't worry about making a mistake, just print another sheet if needed.

TIPS:  You can use scissors or craft knives to cut out the several parts of the model.  When using a knife make several light strokes instead of one heavy stroke.  Paper dulls knife blades quickly so keep a supply handy.  Most modelers use the #11 blade that fits a small handle.  I use a letter opener to score the fold lines making several moderate passes.  Practice will help you develop the skills and improve your results.

WARNING:  Knives and other tools used in card modeling can cause injuries if not used correctly.  Children should proceed only under adult supervision.

Check back often for updates of the 3D modifications and hints, tips and additional sources for help and information on card modeling.

See you soon!


Armchair