In Step 1 we downloaded the two free colored sheets of the Thomas Lincoln house and built the house per the instructions provided.
In Step 2 we mounted the second set of printed sheets to the cereal box card stock.
In step 3 we will begin cutting out the several sections of the building.
Just a reminder, this is a first for me, cutting out details such as doors and windows and mounting them set back from the outside surface of the model, creating a 3D appearance. Do not expect perfection, we will be learning together.
Tools: In the photo below you will see the tools needed for this part of the project: a knife handle with a #11 blade or other knives with break off or replaceable blades, a steel rule toguide the knife blade, a small hammer and nail or straight pin to locate the corners of the doors and windows. Not shown is a letter opener I use to scribe the fold lines.
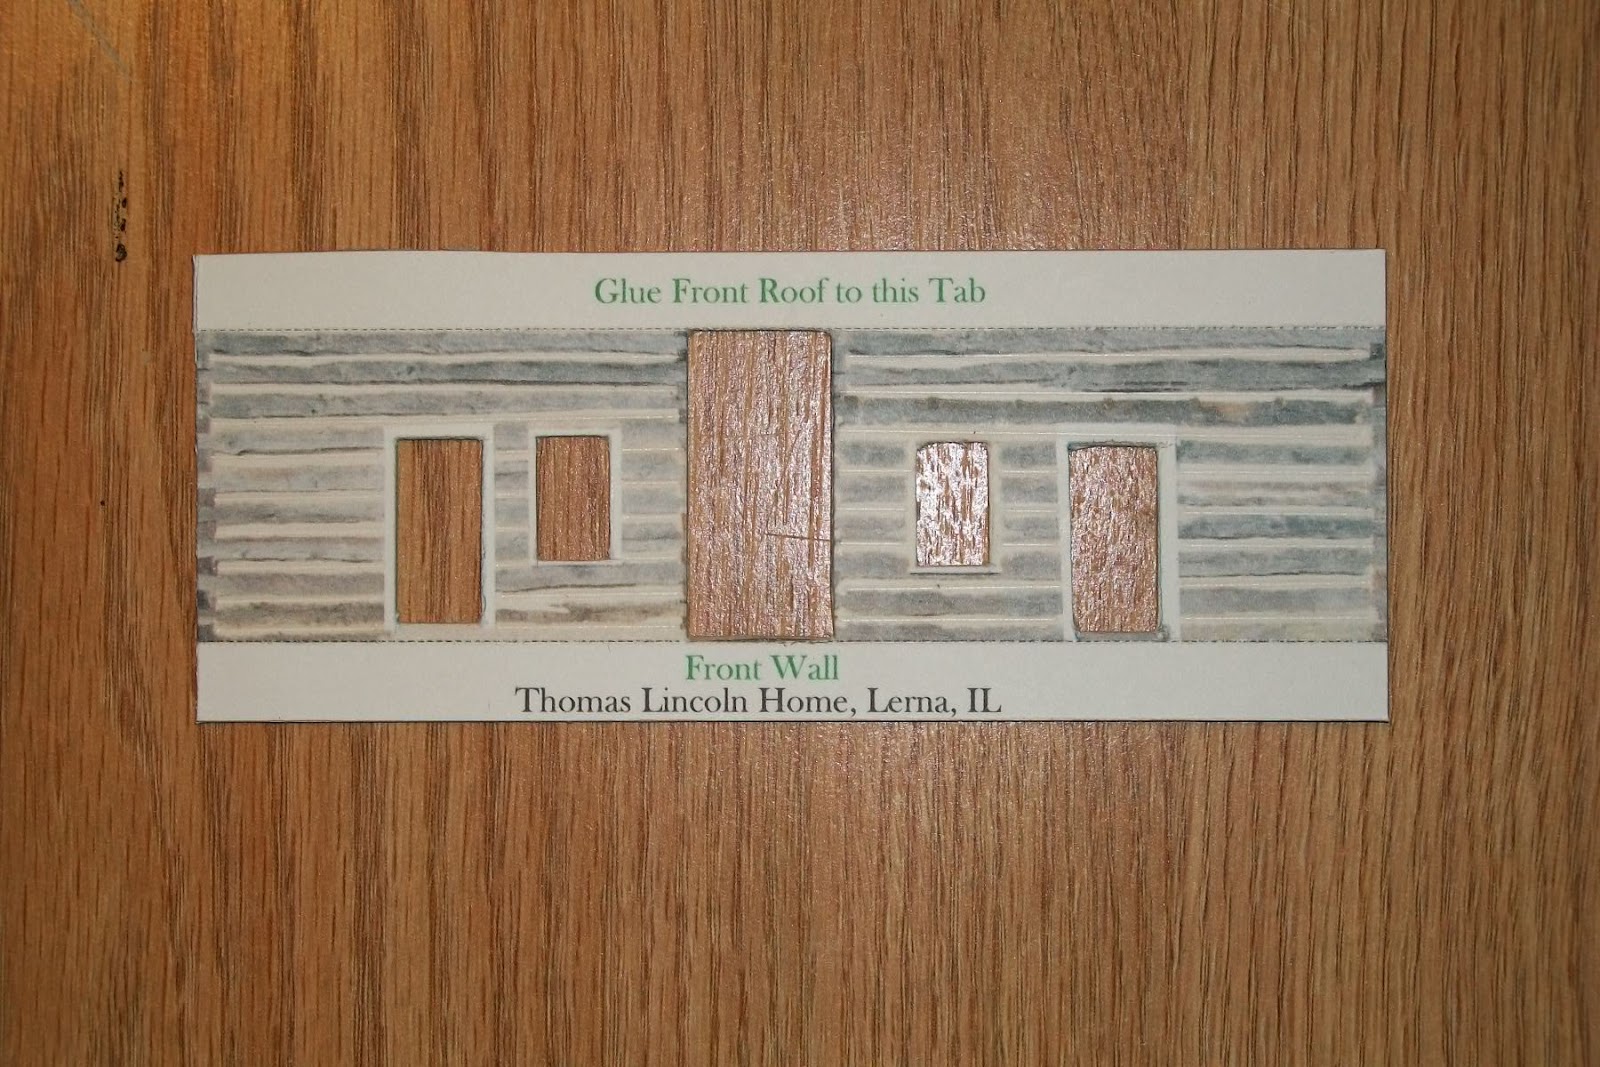
 |
| Tools and mounted, printed sheet, ready to make your 3D model. |
Note: You may wish to practice the several action OP's described below using the extra space around the sheet.
OP. #1 Scribe the fold lines with the letter opener using the steel rule to guide and ensure straight fold lines. Without the cardboard backing this could be done with 3 or 4 firm strokes, but with the card backing I found I also needed to use the knife blade to cut about half way through the backing.
OP. #2 Place the mounted sheet over a scrap of cardboard or foam core to protect the table surface. Carefully place the point of the nail or pin at the corner of each door or window detail to be removed and use just a light tap of the hammer to pierce about half way through the cardboard backing, just enough for you to locate the point of the knife blade.
OP. #3 Place the print on your cutting board and use a steel rule to locate the cutting line between two corner punches, check each location with the blade point, and while holding the steel rule firmly, lightly stroke the knife blade between the two punches several times. Repeat for each side of the door or window and, with firmer strokes continue cutting until the door is cut free.
 |
| Two doors and windows and the center board wall have been removed. |
OP.#4 After all the scribing and cutting is complete remove each part by carefully cutting around the part being sure to NOT cut off the fold tabs. This will leave you with a part shown below.
 |
| Cutout front detail part before folding the tabs. |
OP.#5 Locate the fold lines at a sharp edge and fold tabs down as shown below. If the tabs don't bend with firm pressure you may have to use the knife to cut a little deeper into the backing sheet.
 |
| Front detail with tabs folded down. |
Continue with other details, back, sides and roof, until you have all the parts required for the model.
 |
| This is one of the end details with tabs folded. |
 |
| Details ready for adding the recessed doors and windows for a 3D model |
In Step 4 we will be adding the recessed doors and windows and maybe some outside raised details.
Armchair