My last post, LO#12, consisted of a lot of pictures of hills and cuts formed from corrugated cardboard strips interlaced and secured with dabs of hot glue. Both strips and hot glue are new to me as I have lived with yellow carpenters glue and foam-core board for the last several years. Today (Tuesday 9-11-12) I covered those cardboard strips with the first layer of plaster cloth. I failed to get any shots of how I use the strips so I will delay the details until later.
Here are some 'Before' and 'After' shots to compare todays progress.
#1


#2


#3

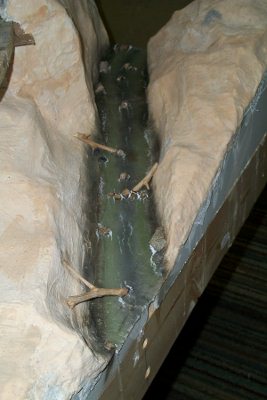
This is the upper track (as it leaves the 3 section bridge) passing through the cut just above the creek.

Here is a better shot of "Two Tired Creek" from the 'other' end located on the 'other' long side opposite all the other pictures. Marvin has done a really great job with the coloring and texture, using many of the artistic skills he uses on his original PRR railroad paintings.
Now, just a couple thoughts on the past couple days work. Corrugated cardboard strips can be cut in two ways; LENGTHWISE, along with the corrugations and CROSSWISE, across the corrugations. Lengthwise produces a stronger strip that I prefer for the vertical supports. Crosswise produces a weaker, but more flexible strip that I like to use in a more or less horizontal position to interweave between the vertical strips. To increase the flexibility I pull the strips over the edge of the table from both sides. I also do it with my fingers, but watch out for paper cuts.

This will be the road passing under the track to connect the upper level (maybe I will call it 'Overton' or 'Highland') to the future 2'x8' extension with yard, engine facilities and maybe some industries and staging.
This time I tinted the water that I wet the plaster cloth with. I mixed several colors to get something of a ground color. It is not as dark as I would like but will prevent the white spots if chipped or scrapped. If you work the plaster cloth with your wet fingers or foam brush it will begin to blend and cover the course 'cloth' weave. Saturday I will add the second coat of cloth and the following Tuesday begin a couple coats of Light Weight Spackle. I color and dilute the spackle with water to make a thick, soupy consistency and apply with a 2' foam brush and try to hide cloth details. To help hide the weave and edges I have been 'stippling' the spackle coat using the side of a 2" foam brush to quickly tap the still wet surface, drawing little beads or pimples of spackle. I am still not really happy with the results, but does do away with the dull smoothness of just brushed spackle.
Hopefully more-useful info for the next post.
Armchair